Steps to Enter a Project User Parameter
The following steps outline the process of adding a parameter to a project user from within the i2b2 Administration Module.
Assumption: The following steps assume you are already logged into the i2b2 Administration Module. If you do not know how to login please see the chapter titled i2b2 Administration Module Install.
| indent |
|---|
|
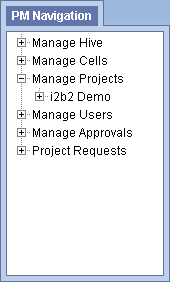
1. In the Navigation panel, expand Manage Projects to display a list of projects. |
| indent |
|---|
|

|
| indent |
|---|
|
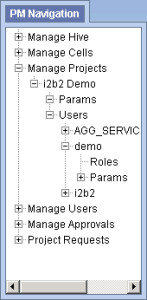
2. Expand the name of the project that has the user you want to add a parameter to. |
| indent |
|---|
|
3. Expand the name of the user to display a list of options. |
| indent |
|---|
|

|
| indent |
|---|
|
4. Click on the Params option that displays under the user's name. |
| indent |
|---|
|
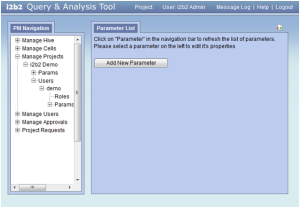
5. The Parameters Summary page will display on the right side of the window pane. |
| indent |
|---|
|

|
| indent |
|---|
|
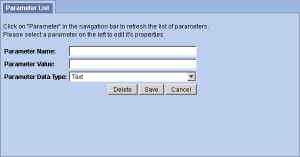
6. Click on Add New Parameter. The Project Parameters page will display. |
| indent |
|---|
|

|
| indent |
|---|
|
7. Enter the name of the parameter, the value for the parameter and the data type for the parameter. |
| indent |
|---|
|
8. Click on Save to save the new parameter. |
| indent |
|---|
|
9. The Parameters Summary page will display with the new parameter. |
| indent |
|---|
|
10. In the Navigation panel click on Params to refresh the hierarchical tree and display the new parameter. |


