Steps to add a user to a project in i2b2
The following steps outline the process of adding a user to a project in the i2b2 Administration Module.
| indent |
|---|
|
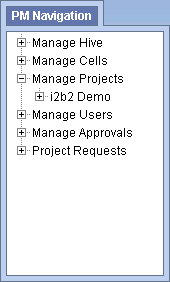
1. In the Navigation panel, expand Manage Projects to display a list of projects. |
| indent |
|---|
|

|
| indent |
|---|
|
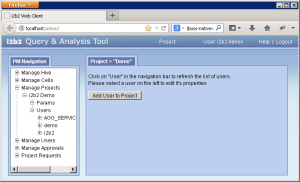
2. Expand the name of the project you want to add a user to. |
| indent |
|---|
|
3. Click on the Users option that displays under the project's name. |
| indent |
|---|
|
4. The Project Users page will display on the right side of the window pane. |
| indent |
|---|
|

|
| indent |
|---|
|
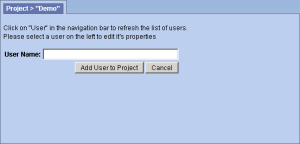
5. Click on Add User to Project. The Add Project User page will display. |
| indent |
|---|
|

|
| indent |
|---|
|
6. Enter the name of the user you want to add to the project. |
| Info |
|---|
|
The User Name entered on this page is equivalent to the User Name in Manage Users. |
| indent |
|---|
|
7. Click on Add User to Project to add the user to the project. |
| indent |
|---|
|
8. The Project Users page will display. |
| indent |
|---|
|
9. In the Navigation panel click on Users to refresh the hierarchical tree and display the user you added to the project. |


