Setting up a Windows service to run your Wildfly Web Server will allow the server to continuously run in the background, without any user interaction. Another advantage of a Windows service is that it will run no matter which user is logged onto the machine. This means you do not have to leave a user logged onto the server just to keep Wildfly running. You can also configure the service to start automatically if the system is rebooted.
The information in this section will guide you through setting up Wildfly 10 to run as a Windows Service.
Overview of Steps
These are the basic steps that will be taken to set up the Windows Service.
| indent |
|---|
|
Step 1: Copy Files to Wildfly Directory |
| indent |
|---|
|
Step 2: Update the Service Batch File Settings |
| indent |
|---|
|
Step 3: Install the Service |
| indent |
|---|
|
Step 4: Update the Windows Service Properties |
| indent |
|---|
|
Step 5: Verify Wildfly Service Started |
Step 1: Copy Files to Wildfly Directory
Steps to Copy Files
| indent |
|---|
|
1. Go to YOUR_WILDFILY_HOME_DIR\docs/contrib/scripts. |
| indent |
|---|
|
Example: C:\opt\wildfly-17.0.0.Final\docs/contrib/scripts |
| indent |
|---|
|
2. Copy the service folder to C:\opt\wildfly-17.0.0.Final\bin |
Step 2: Update the Settings in the Service Batch File
One of the files in the service folder you copied to your Wildfly directory was service.bat.
Steps to Modify service.bat
| indent |
|---|
|
1. Go to YOUR_WILDFILY_HOME_DIR\bin\service |
| indent |
|---|
|
Example: C:\opt\wildfly-17.0.0.Final\bin\service |
| indent |
|---|
|
2. Locate the service.bat file and open it in Edit Mode. |
| Tip |
|---|
|
If you are installing multiple servers you may want to update these settings with something that is more meaningful. The DISLAYNAME will appear in your Windows Services list so if you are installing multiple servers on the same windows machine you may want to update these settings with something that is more meaningful. Example: If you have a development and production environment you may want to update the settings to one of the following. DISPLAYNAME=Wildfly Application Server 17.0.0.Final Development
DISPLAYNAME=Wildfly Application Server 17.0.0.Final Production The SHORTNAME needs to be unique
|
| indent |
|---|
|
4. To prevent memory loss issues you need to modify the JAVA_OPTS setting to increase the memory. |
| indent |
|---|
|
Current Setting | New Setting |
|---|
JAVAOPTS=-Xrs | JAVAOPTS=-Xmx1024M -Xms512M -XX:MaxPermSize=512M -Xrs |
|
Step 3: Install the Service
The third step in this process is to install the service.
Installation Steps
| indent |
|---|
|
1. Open the Windows Command Prompt as an Administrator. |
| indent |
|---|
|
2. Enter the following command to change your directory to the bin directory in your WILDFLY directory. |
| Panel |
|---|
| borderColor | #ccc |
|---|
| bgColor | #ffffff |
|---|
| titleBGColor | #DDD9C3 |
|---|
| borderStyle | solid |
|---|
| title | Change Directory Command |
|---|
|
| indent |
|---|
| CD YOUR_WILDFLY_HOME_DIR\bin\service |
|
| indent |
|---|
|
Example: C:\opt\wildfly-17.0.0.Final\bin\service |
| Info |
|---|
|
If you have set your JBOSS_HOME system variable you can replace the Wildfly directory path with %JBOSS_HOME%. Example: CD %JBOSS_HOME%\bin\service |
| indent |
|---|
|
3. Enter the following command to install the service. |
| Panel |
|---|
| borderColor | #ccc |
|---|
| bgColor | #ffffff |
|---|
| titleBGColor | #DDD9C3 |
|---|
| borderStyle | solid |
|---|
| title | Change Directory Command |
|---|
|
|
| indent |
|---|
|
4. Provided there are no errors the service will be installed. |
Step 4: Update the Windows Service Properties
The fourth step is to update the properties of the service you just installed. During this step we will set the JBoss service to start automatically and we will start the service to make sure it was installed correctly.
Steps to Update Properties
| indent |
|---|
|
1. Go to your Administrative Tools directory |
| indent |
|---|
|
a. Click on Start and select Control Panel. |
| indent |
|---|
|
b. In the Control Panel click on System and Security. |
| indent |
|---|
|
c. Click on Administrative Tools |
| indent |
|---|
|
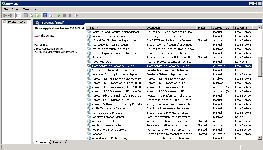
2. Double click on Services to display a list of local services installed on your server. |
| indent |
|---|
|
3. Scroll to the service called Wildfly Application Server. |
| Note |
|---|
|
The actual name that appears in the list of services depends on what you entered in the service.bat file for the DISPLAYNAME setting. |
| indent |
|---|
|

|
| indent |
|---|
|
4. Using the mouse, right click on the name of the service to display the pop-up menu. |
| indent |
|---|
|
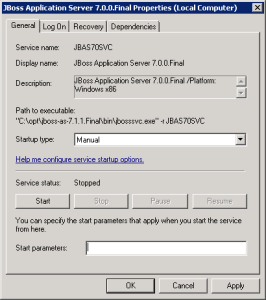
5. Select Properties to open the Properties Window. |
| indent |
|---|
|

|
| indent |
|---|
|
6. At Startup Type select Automatic from the drop-down list. |
| indent |
|---|
|
7. Click on Start to start the Wildfly services. |
| indent |
|---|
|
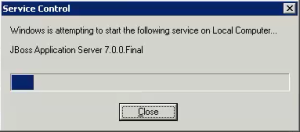
8. A dialog window will open displaying the progress of starting the service. |
| indent |
|---|
|

|
| indent |
|---|
|
9. Once the startup process is complete click on OK to save the changes. |
Step 5: Verify Wildfly Server Started
The fifth and final step is to verify the Windows service started your Wildfly server.
Verification Steps
| indent |
|---|
|
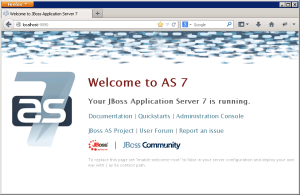
1. Open a web browser and enter the following address: |
| indent |
|---|
|
2. The Wildfly Welcome page will display if your Wildfly server started correctly. |
| indent |
|---|
|

|


